Branxton Hill
Climbing this steep slope clearly demonstrates that if the Scots had continued to hold the high ground it would have been suicidal for the English to leave the their side of the valley, struggle through the boggy morass, and then attack a defensive Scottish line near the top of Branxton Hill.
The Story of the Battle of Flodden is now, and on the following information boards, told from the Scottish perspective to explain why various decisions were made by King James IV.
D. Ready for the Fray
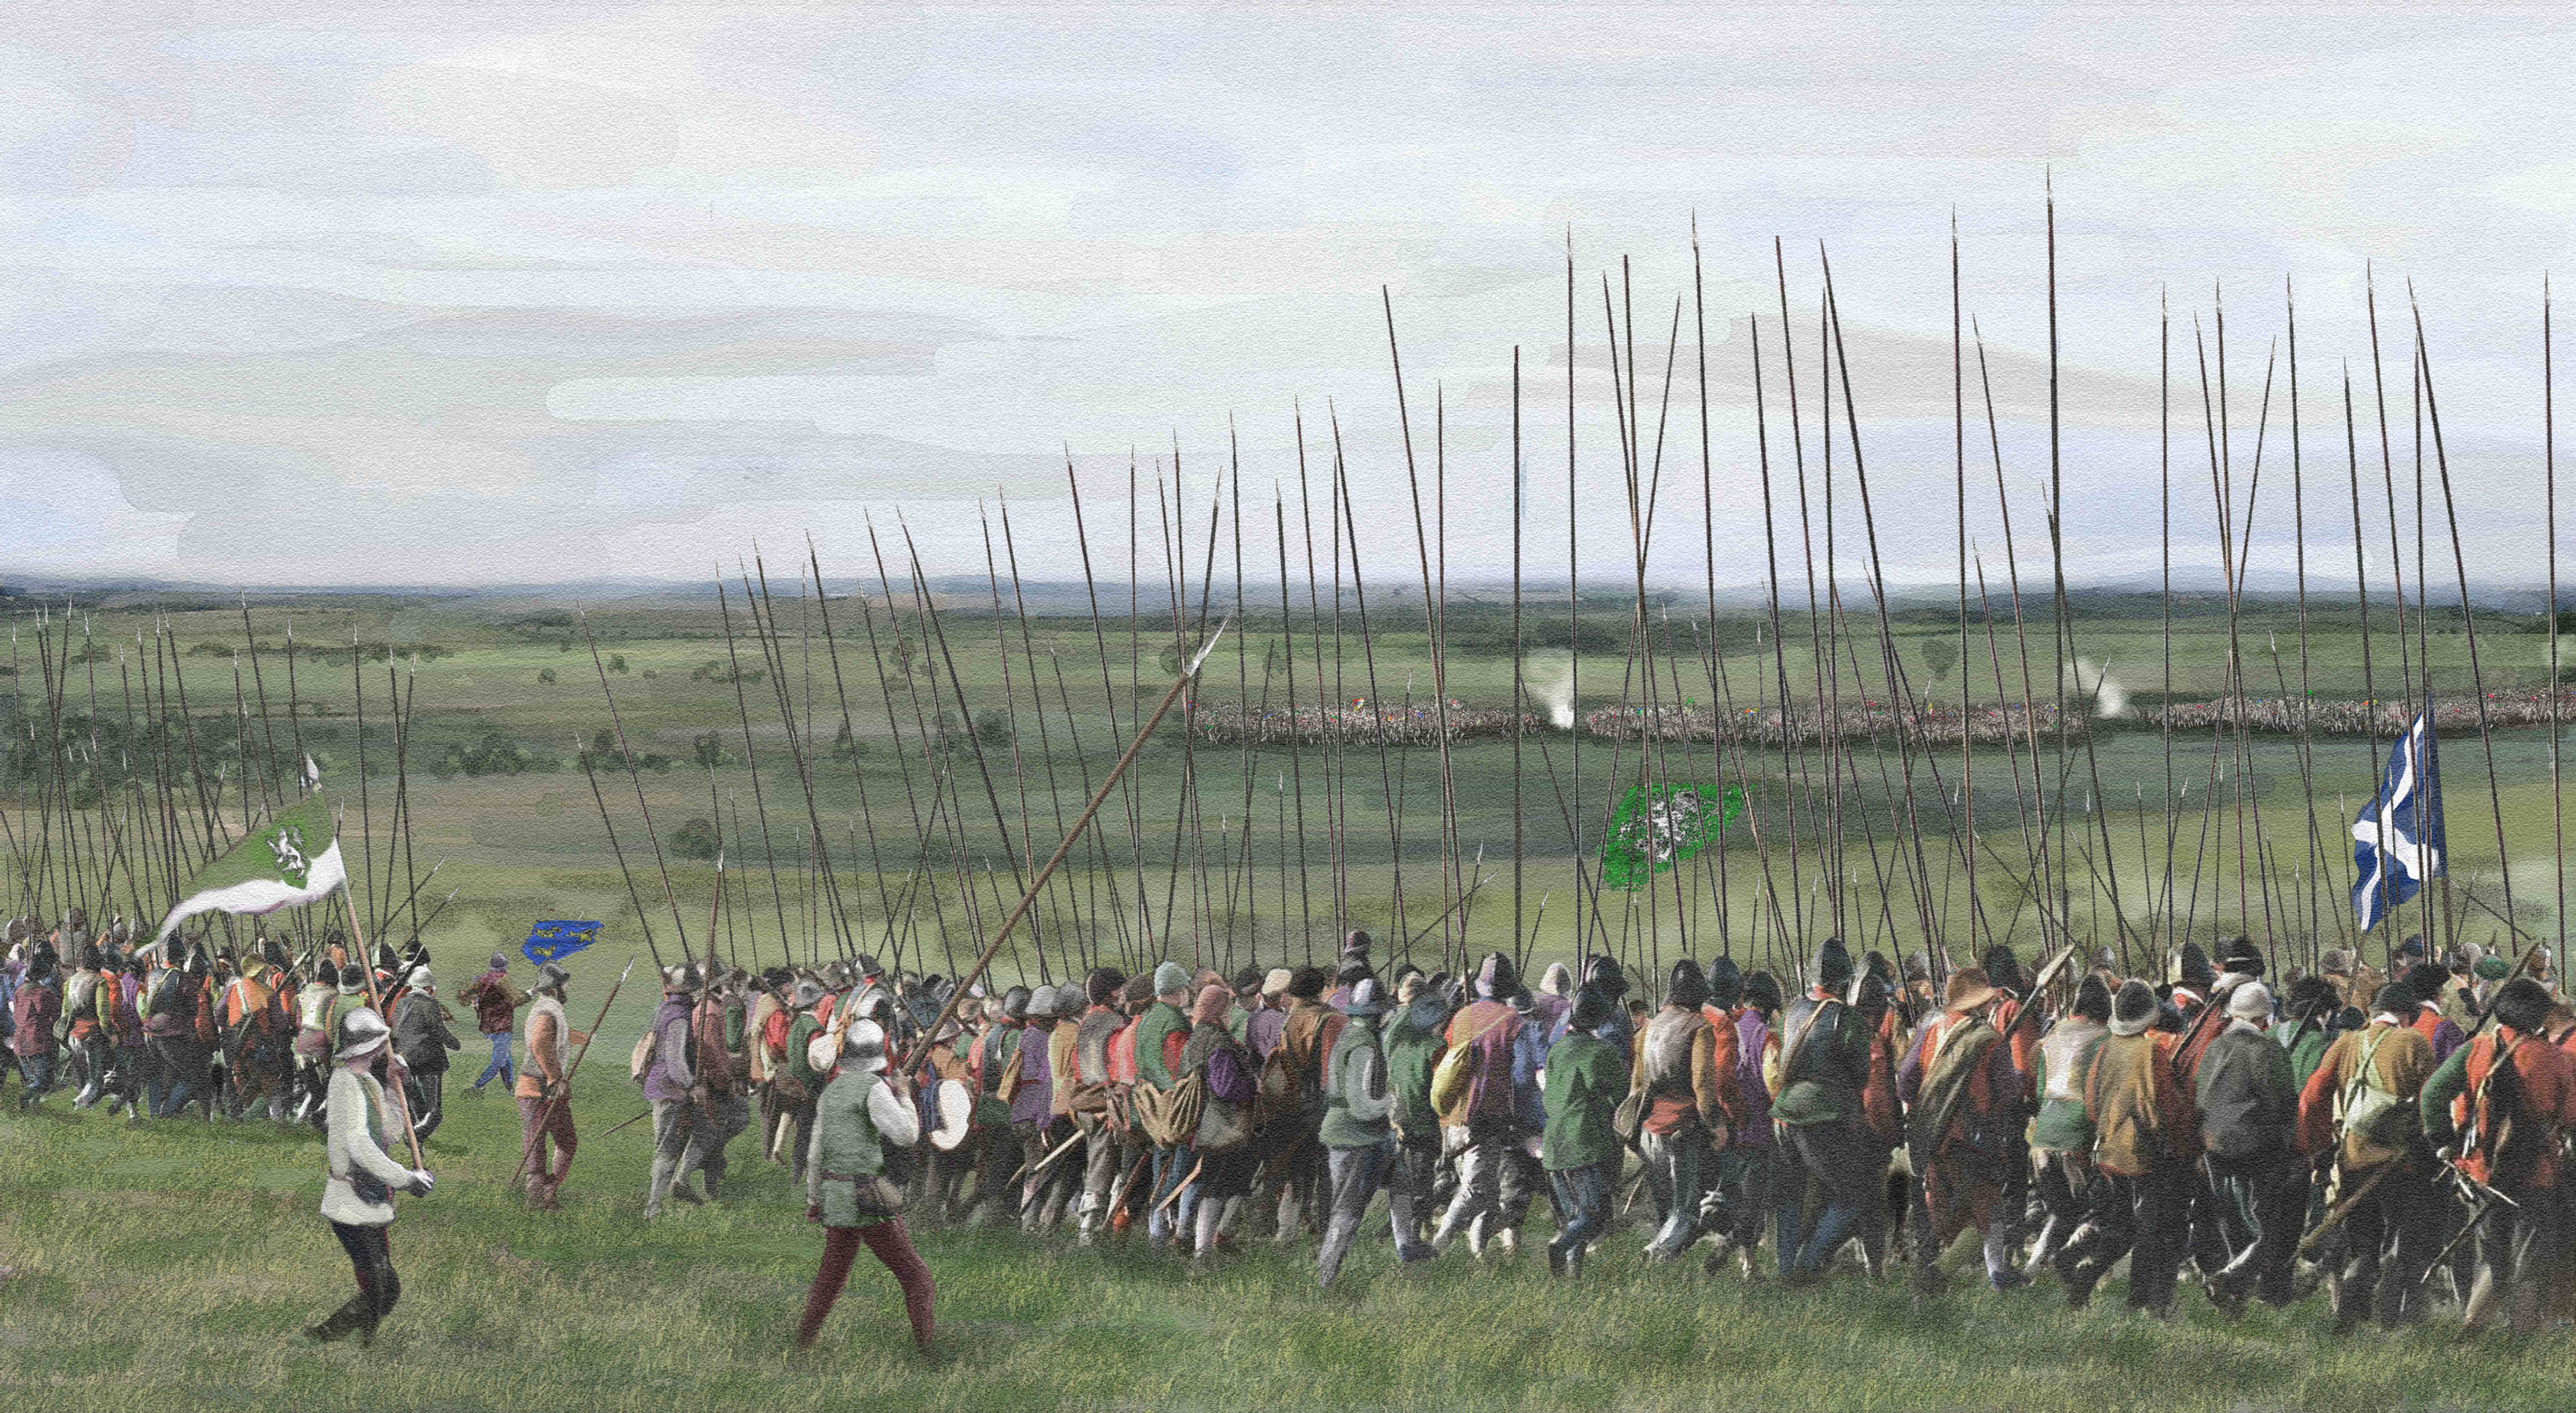
The board, Ready for the Fray’ at the top of the slope depicts the Scottish Vanguard on the left flank advancing down the western end of Branxton Hill to engage the English Vanguard in the fields beyond the ruined farm buildings in the valley. This is as close as the battlefield trail allowed, but the Scottish Vanguard move to engage the English Vanguard action started about 800 yards to the west of this point.
⇒ Proceed eastwards along the track to E. The Scottish Guns board, and then to F. the ‘Let Battle Commence’ board.
Continue Tour >